|
|
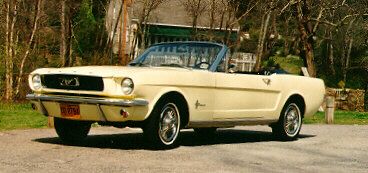
| 1966 Sprint
200 Mustang Convertiblele |
| |
| This
car for sell or trade... it is time to move on I am looking for a
1967 or 1968 Mustang Convertible e-mail
me from the contact page |
|
The Project
Car Awaits
|
|
|
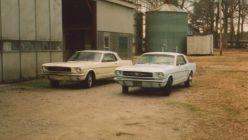
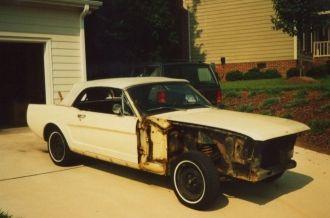
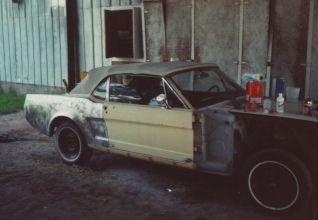
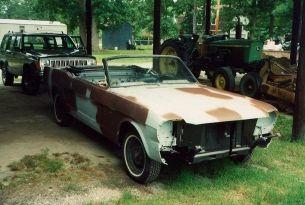
These are the two Mustangs I had for a very short time. The
blue one was my existing restored 65 that I sold to purchase the
yellow 66 convertible
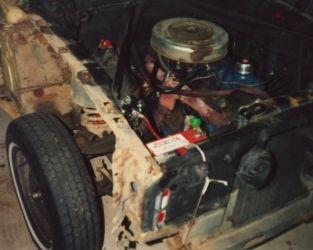
Luckily this car had already been through a engine replacement
(unfortunately not the original engine) and professionally done
floor pan replacements. I drove the car for a few months to
make sure the car was in good mechanical condition (after I replaced
the brake system). Then I decided it was solid enough to restore.
I did not want to create a trailer show car, but instead a car that
was fun to drive and one I felt could be dependable.
|
|
Disassemble
Begins
|
|
|
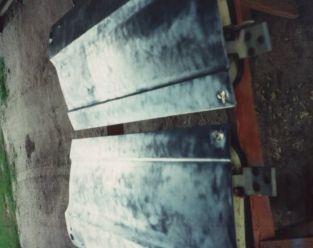
I started with the fenders. These were relatively easy to
remove once you knew were all the "hidden" bolts were.
These fenders, I came to find out, were from a 1964 1/2 Mustang
as well as the front grille opening for the lights and the hood.
I guess when the car was in a slight fender bender early in its
life they replaced the parts with what was easily available.
I decided that the restoration was going to need more space than
my one and a half car garage. My parents lived a hour away
and my father had a farm shop that I could use for a while.
I drove the car this way to its new home for the next year or so.
I assumed this was legal as long as I used my hand signals,
was passed by a sheriff deputy and he did not stop me.
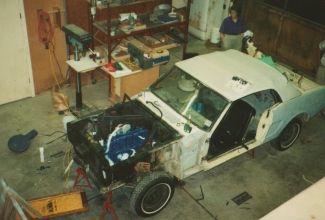 
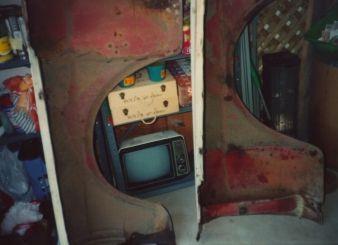
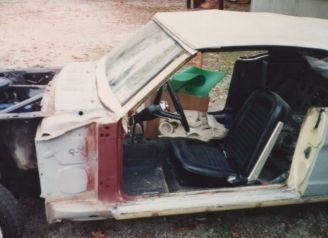
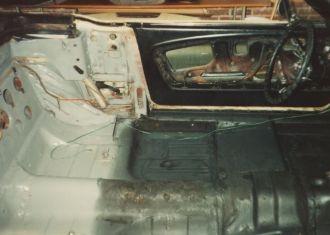
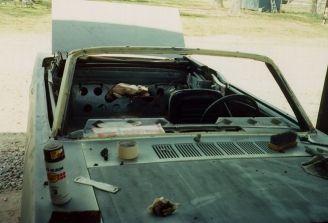
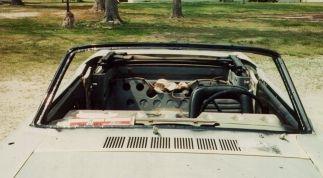
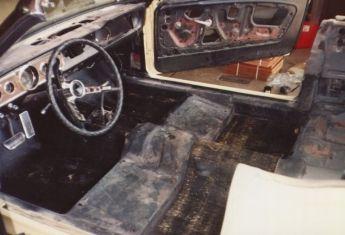
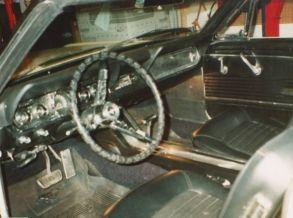
One the car was in its new home I removed virtually everything
that was bolted on (picture was taken after some of the work was
complete on the car). This is where space and organizational
skills are very helpful as well as some good reference books.
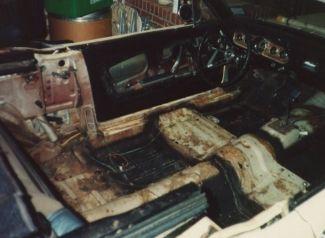
The interior was also removed. As I stated earlier this car
had a new full set of floor pans and this made this job easier.
|
|
Begin
Stripping the Paint and Body Work
|
|
|
 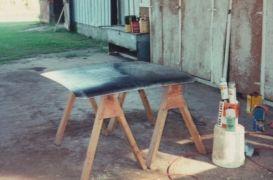
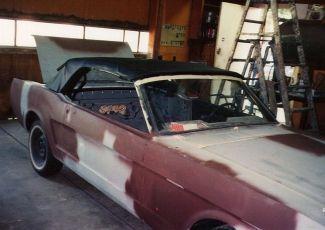
A gel-type chemical stripper was used on all body panels, with
a final stripping done with a 3M Scotchbrite pad on a drill motor.
I tried to strip, metal etch, a base prime coat a panel every day.
POINT #1 - DO NOT EXPECT THE PRIMER TO STOP RUST ALONE WITHOUT
A FINAL COAT OF PAINT!!!!
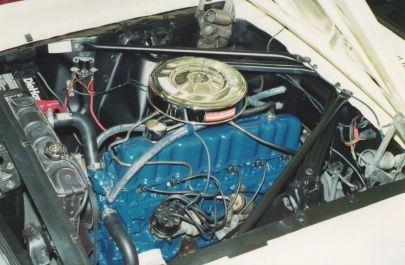
I left the passenger seat in the car to make it easy to move.
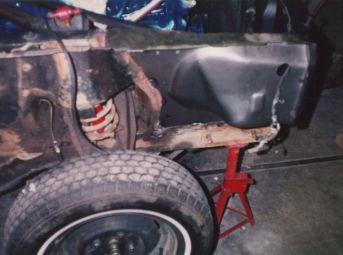 
Since the font area had slight sheet-metal damage from an accident
now was the time to replace the panels. These were wire welded
in (this is not the way the original panels were installed).
Also note the engine has been repainted and detailed

Some area, such as the lower parts of the front fenders, required
the installation of some partial panel replacements. These
were carefully fitted, the metal was offset lapped and pop-riveted.
To date I have not had a problem with this method.
The doors were in good shape, but here is were I made a mistake
that I did not find out about until about 5 years latter.
Rust was in the typical spot in the front and rear of the door.
When I brazed in some filler metal (as can be seen in the photo)
I did not remove enough of the rusted material. Rust has bubbled
out at these points now.
POINT #2 - REMOVE PAST THE RUST DAMAGE AND DO NOT DEPEND ON CHEMICAL
TO TOTALLY STOP THE RUST!!!
|
|
Painting
Part I
|
|
|
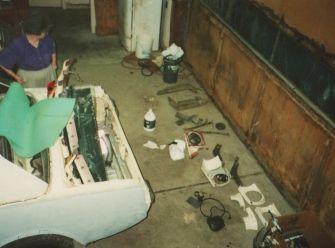
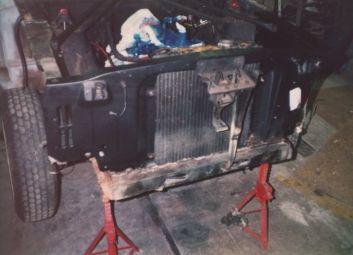
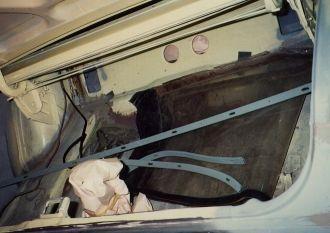
The floor pans were cleaned and the metal painted with a rust-inhibiting
primer and paint. This car had the power top so I also made
sure the lines were in the proper location so they would not be
damaged.
Hidden areas of the car , that could be visible, were painted with
the final coat color (Springtime Yellow). Other area, such
as where the drip rail is for the top, were primed and painted with
a cold galvanizing compound.
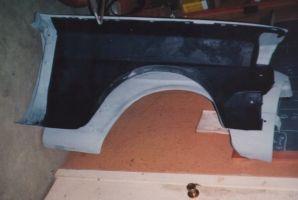
The underside of the fenders were cold galvanized and undercoated.
POINT #3 - DON"T USE A CHEAP UNDERCOATING AND MAKE SURE THE
SURFACE IS CLEAN!!!

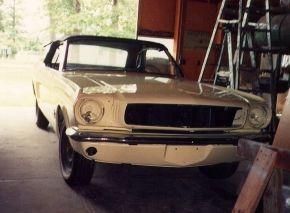
A paint shop in the town near my parents had done work for me before
on my other Mustang so I gave them a try again. I partially
reassembled the car an drove it to them to "point-up"
my body work and get a good base coat of primer. The shop
recommended that the top be installed between the final prime coat
and the final coat. This would keep the paint from being
damaged from the top installation. I am still not sure this
was necessary but it sounded good at the time.
This was the way I got the car back from the paint shop
|
|
Windshield
Work
|
|
|
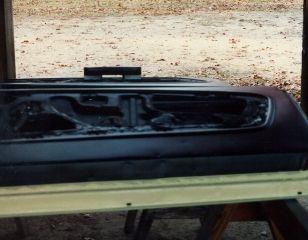
Since the windshield appeared to be in good condition but the rubber
was possibly original to the car I decided now was the time to do
this too. Windshield remove is not something that is difficult,
but it is also easy to make a mistake on. The rubber
is cut out with a knife and the windshield is slowly lifted out
of place. All of the old grubber gasket is removed and the
area cleaned.
I did not have any heavy rust in the window channel, but I did
coat the area with rust-inhibitor paint and some rubberized compound
that is used for grips on pliers. The rubber gasket is now
replaced on the windshield. A small rope is placed in the
inside grove of the gasket. The windshield/gasket is place in the
proper location and slight pressure (this is the tricky part) is
placed on the outside of the windshield while someone inside takes
the rope out, setting the gasket around the frame.
POINT #4 - IF YOU DON"T FEEL COMFORTABLE DOING A JOB LET A
PROFESSIONAL DO IT!!!
|
|
Convertible
Top Replacement
|
|
|
Convertible parts are now easily available that were not around
when I was working on this project. Therefore I restored some
items, such as the tack strips and painted them with cold-galvanizing.
One area that is of concern is the front lead weight on the
top which is difficult to restore and replace. This item typically
oxidizes and has a white powder on it as well as pits. I coated
mine with the same rubber compound I used on the windshield frame.
This seem to have worked well, except you can still see some of
the pits in the surface.
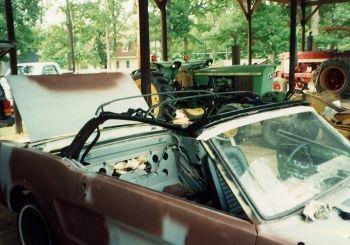 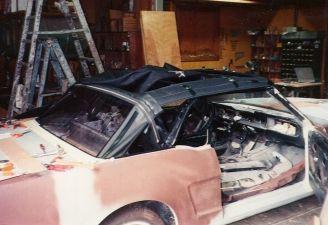
Dimension on the top frame are critical. Make sure you have
the frame correct before you start to install the top.
Once the top is installed it is stapled in place. I used
stainless steel staples and I highly recommend this.
Like the windshield removal and replacement this is not for the
"faint at heart". It can be done by the "shade
tree mechanic" but it is a critical item that demands attention
to detail. To be honest I doubt I will install the next one
myself.
|
|
Painting
Part II
|
|
|
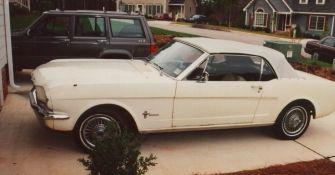
This is the final coat and this is where the "white glove"
work begins. Great care must be taken not to damage the paint.
The bumpers and the vent windows are the most troubling for this.
|
|
Final
Detailing
|
|
|
Sound/heat absorbing mats were installed under the carpet, and
the interior reinstalled (after it was repainted).
POINT#5 - ENAMEL AND LACQUER PAINTS SOMETIMES DO NOT MIX WELL (BUBBLE
UP) AND SOMETIME THE INTERIOR PAINT IS NOT THE SAME AS THE EXTERIOR.
 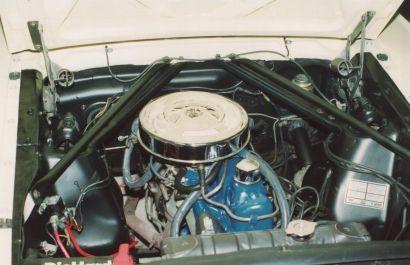
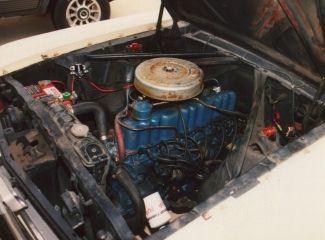
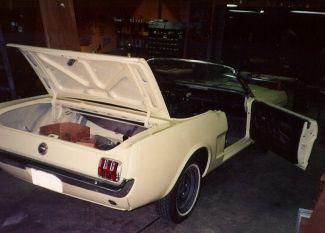
The engine compartment was detailed, air cleaner re-chromed, and
brought up to nearly the same as original. The decal in the
shock tower (as seen in the photo above right) was actually at an
angle on the original when I stripped the engine compartment, but
I thought the horizontal installation was better. Unfortunately
the engine compartment doesn't look this good anymore (see POINT
#6).
POINT #6 - READ ALL DEGREASER LABELS COMPLETELY BEFORE USING THEY
CAN DISCOLOR YOU ENGINE WHEN NOT USED PROPERLY!!!
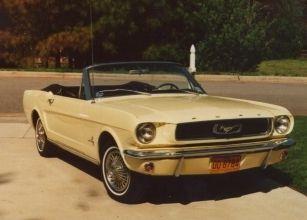
Ready for sun and show fun!!!!
|
| |
|
|
Click
on the links below to see more examples
Hot Wheels
(Revised!)
GI Joe (Revised!)
Major
Matt Mason
FORD Mustang
Mustang Gifts & More
Johnny
Express
Johnny Lightning
Johnny Service
Matchbox
Billy Blastoff
(Revised!)
Sea Devils NEW
Erector Set
Corgi
Dinky
Slot Cars
Motorific
Tootsietoys
Toy Steam
Zowees
Pedal Cars & Tractors
(Revised!)
Hallmark Collectibles
Tin & Tonka Toys
LEGO
NEW
GIRLS
STUFFNEW
Farm
Toys & TractorsNEW
Poster
Art
Toy Art
Big Truck Art
Hot Wheels
Art
Car Chase Movies
Books & Movies
New
Video Games & Consoles
New Toys For Sale
Vintage Toys For Sale
Toy Restoration
Toy Story (s)
Toys Wanted
Buy &
Trade
Search
e-Greeting Cards
Favorite Links
Web Site Development
My Exam Mail
|

